quilt
Catalog Installation
Quilt is a data mesh that verifies the integrity of your data so that teams can find, understand, and make discoveries based on data of any size or in any format.
A Quilt instance is a private portal that runs in your virtual private cloud (VPC).
Quilt is available through AWS Marketplace. Its underlying infrastructure can be deployed through CloudFormation or Terraform.
Help and Advice
We encourage users to contact us before deploying Quilt. We will make sure that you have the latest version of Quilt, and walk you through the CloudFormation deployment.
We recommend that all users do one or more of the following:
-
Schedule a Quilt engineer to guide you through the installation
-
Join Quilt on Slack to ask questions and connect with other users
Requirements and Prerequisites
Knowledge Requirements
Running Quilt requires working knowledge of AWS CloudFormation, AWS S3 and Elasticsearch Service.
Before you install Quilt
You will need the following:
- An AWS account.
- The service-linked role for Elasticsearch
This role is not created automatically when you use CloudFormation or other APIs.
You can create the role as follows:
aws iam create-service-linked-role --aws-service-name es.amazonaws.com - The service-linked role for Elasticsearch
- IAM Permissions to create the CloudFormation stack.
- You may choose to use a CloudFormation service role for stack creation and updates.
- Refer to this example service role and modify as needed to fit your use case.
Ensure that your service role is up-to-date with the example before every stack update so as to prevent installation failures.
- The ability to create DNS entries (Route 53 alias records or CNAMEs) for your company’s domain.
- An SSL certificate in the same region as your Quilt instance to secure the
domain where your users will access your Quilt instance.
- For example, to make your Quilt catalog available at
https://quilt.mycompany.com, you require a certificate for either*.mycompany.comor for the following 3 domains:quilt.mycompany.com,quilt-registry.mycompany.comandquilt-s3-proxy.mycompany.comin the AWS Certificate Manager. - You may either create a new certificate, or import an existing certificate.
- The ARN for this certificate or set of certificates is required for use
as the
CertificateArnELBCloudFormation parameter.
- For example, to make your Quilt catalog available at
- For maximum security, Quilt requires a region that supports AWS Fargate. As of this writing, all U.S. regions support Fargate.
- An S3 Bucket for your team data. This may be a new or existing
bucket. The bucket should not have any notifications attached to
it (
S3 Console > Bucket > Properties > Events). Quilt will need to install its own notifications. Installing Quilt will modify the following Bucket characteristics:- Properties > Object-level logging (will be enabled).
- Properties > Events (will add one notification).
Buckets in Quilt may choose to enable versioning or disable versioning. It is strongly recommended that you keep versioning either on or off during the entire lifetime of the bucket. Toggling versioning on and off incurs edge cases that may cause bugs with any state that Quilt stores in Elasticsearch due to inconsistent semantics of
ObjectRemoved:DeleteMarkerCreated. - Available CloudTrail Trails in the region where you wish to host your stack (learn more).
- A license key or an active subscription to Quilt Business on AWS Marketplace.
- Click
Continue to Subscribeon the Quilt Business Listing to subscribe then return to this page for installation instructions. - The CloudFormation template and instructions on AWS Marketplace are infrequently updated and may be missing critical bugfixes.
- Click
Installation Methods
AWS Marketplace is the way to acquire and access Quilt; it launches Quilt through CloudFormation. Separately, there are two infrastructure deployment paths: CloudFormation and Terraform. In both cases, the Quilt application runs as a CloudFormation stack. With CloudFormation alone, all resources are managed within a single stack. With Terraform, an outer Terraform layer first provisions the foundational infrastructure (VPC, database, search cluster), then deploys the CloudFormation stack automatically, wiring in those resources.
Use CloudFormation if you want a straightforward, self-contained deployment. Use Terraform if you need infrastructure-as-code control over the underlying network, database, and search resources.
AWS Marketplace
You can install Quilt via AWS Marketplace. As indicated above, we recommend that you contact us first.
CloudFormation
You can perform stack update and creation with the AWS Console, AWS CLI, or other means.
Important: Use Quilt-provided CloudFormation templates without modification. Customizing templates may result in deployment issues and can affect your service agreement coverage. If you require specific customizations, please contact your Quilt account manager to discuss supported options.
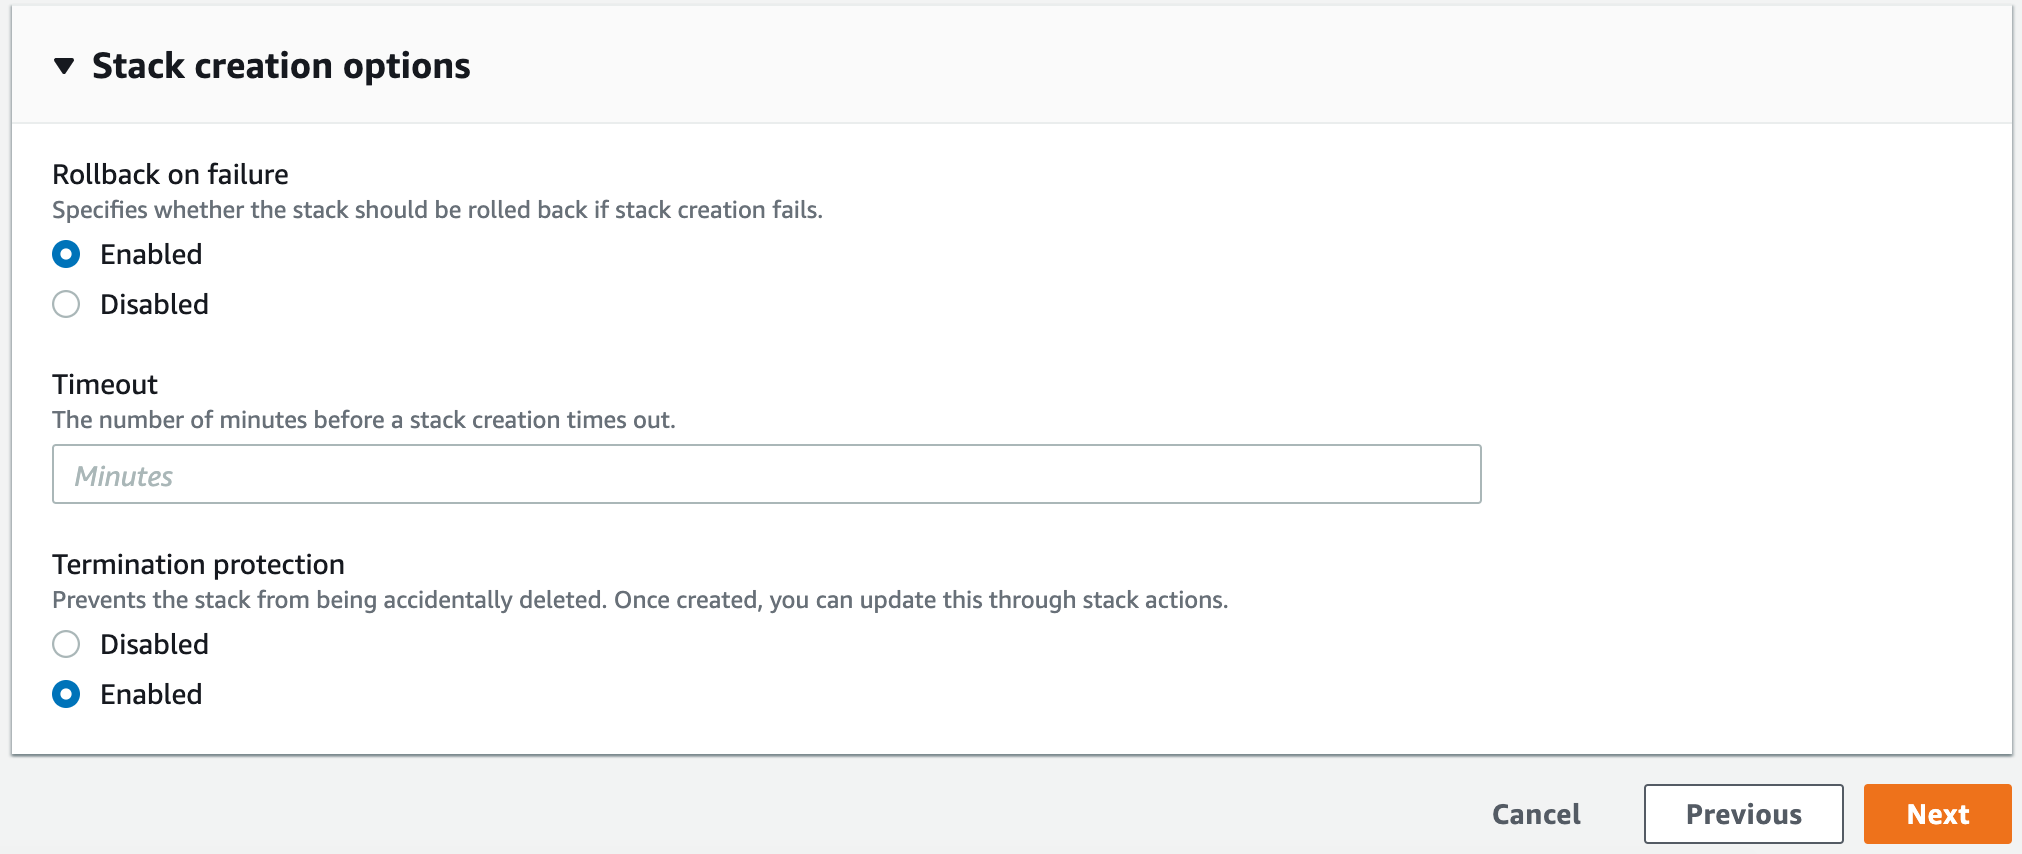
In all cases it is highly recommended that you set the --on-failure policy
to ROLLBACK so as to avoid incomplete rollback and problematic stack states.
In the AWS Console this option appears under the phrase “Stack failure options.”
-
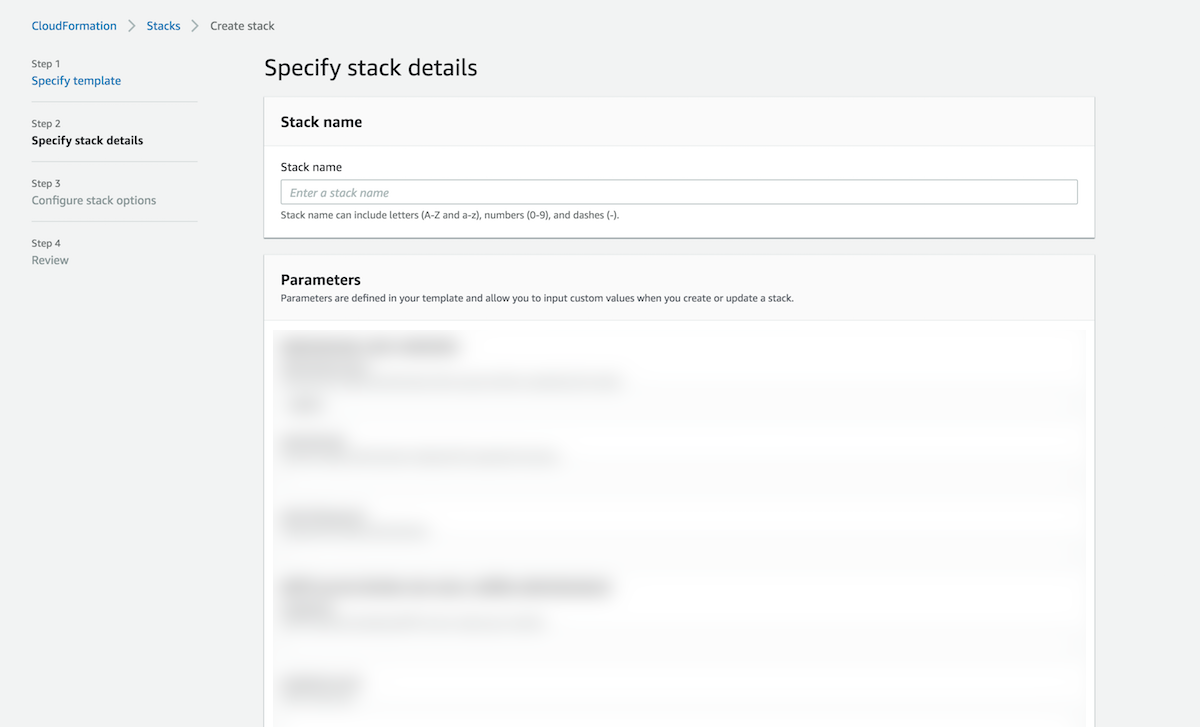
Specify stack details in the form of a stack name and CloudFormation parameters. Refer to the descriptions displayed above each text box for further details.
-
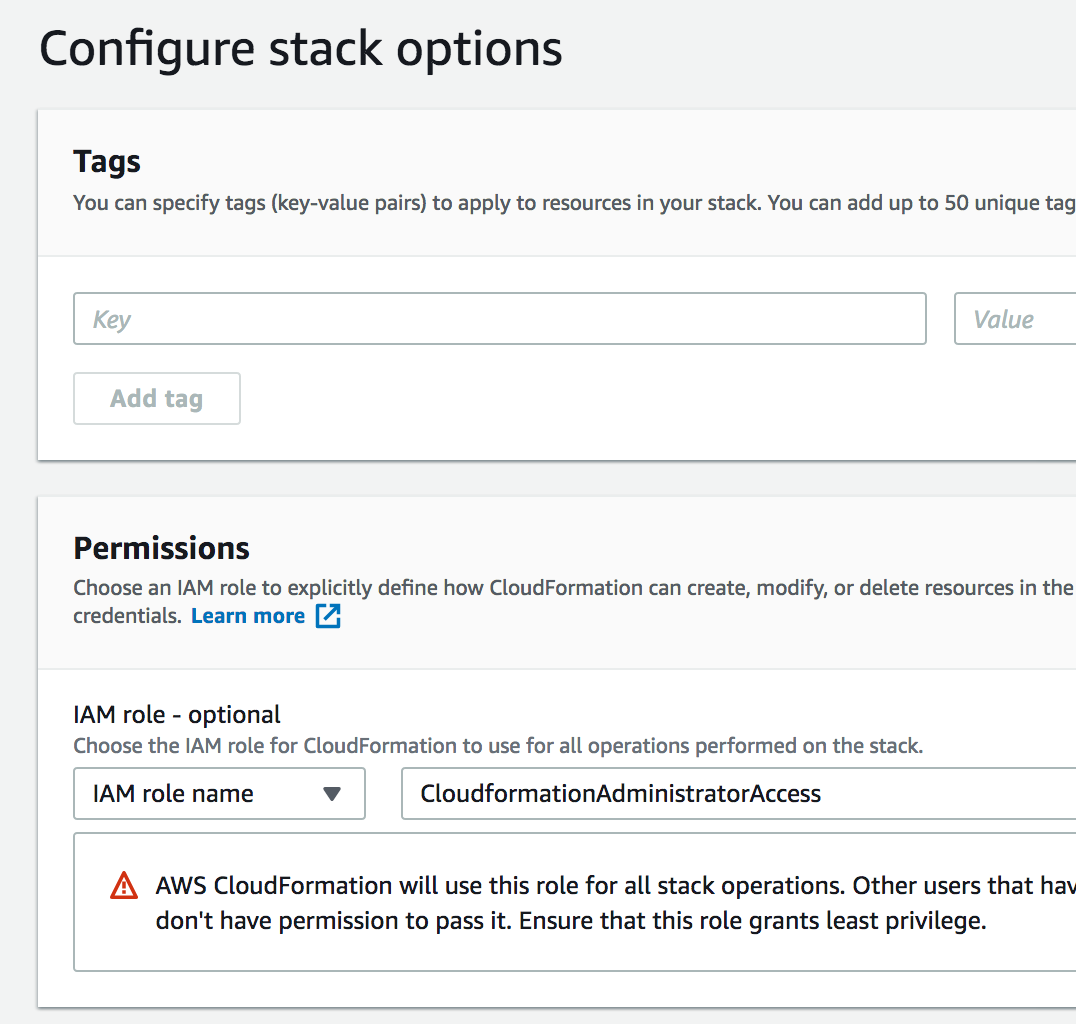
If you wish to use a service role, specify it as follows:
-
Under Stack creation options, enable termination protection. This protects the stack from accidental deletion. Click Next.
-
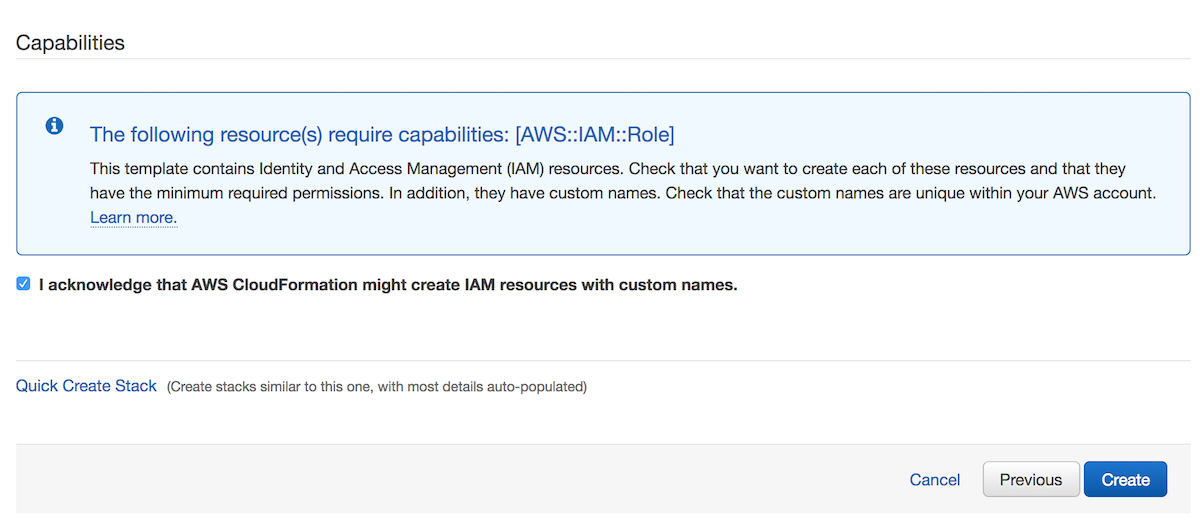
Check the box asking you to acknowledge that CloudFormation may create IAM roles, then click Create.
-
CloudFormation may take between 30 and 90 minutes to create your stack. You can monitor progress under Events. On completion you will see
CREATE_COMPLETE.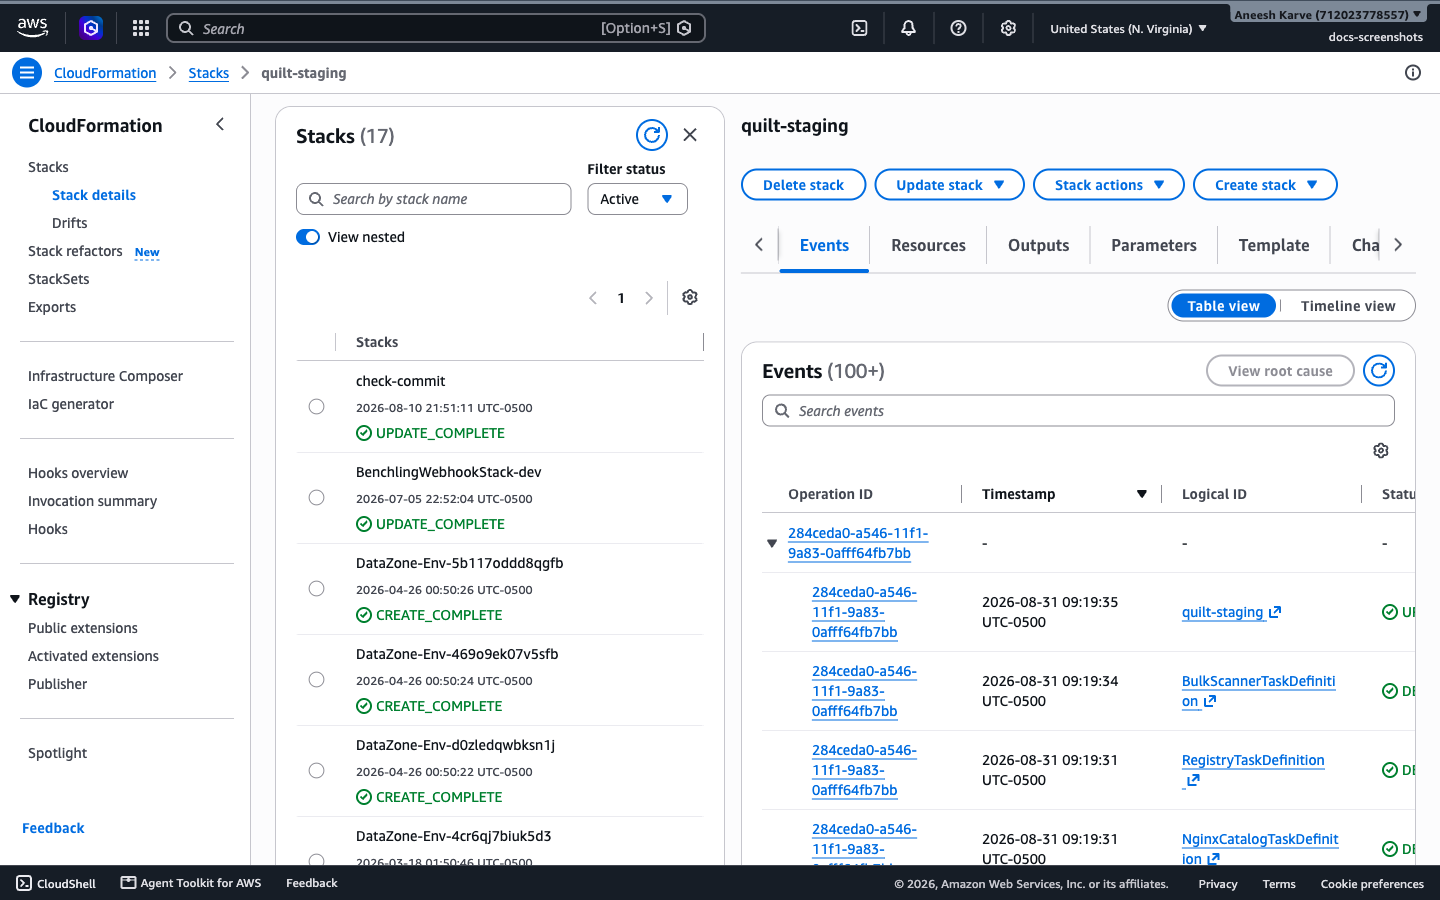
-
To finish the installation, you will want to view the stack Outputs.
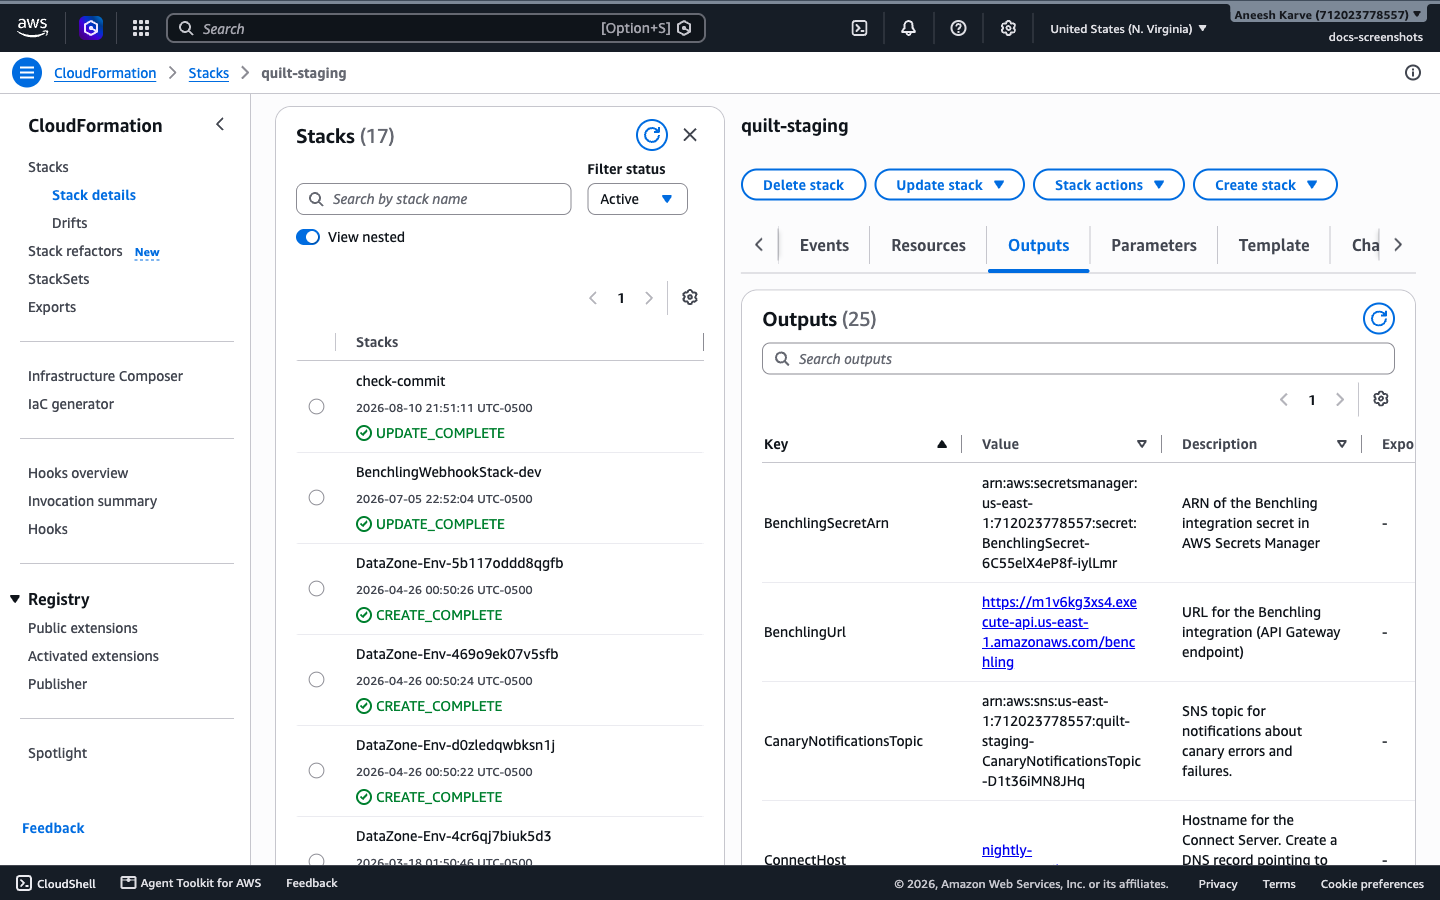
Terraform
To install Quilt using Terraform:
Terraform users must request a compatible CloudFormation template from Quilt:
Contact your account manager to obtain a template that works with Terraform and includes necessary variables.
Important: Use Quilt-provided Terraform modules and CloudFormation templates without modification. Customizing these resources may result in deployment issues and can affect your service agreement coverage. If you require specific customizations, please contact your Quilt account manager to discuss supported options.
-
Set up your project directory as follows:
 quilt_stack/
 ├── main.tf
 └── my-company.yml
Use examples/main.tf as a template.
-
Define your AWS profile:
export AWS_PROFILE=your-profile-name -
Initialize Terraform:
terraform init -
Plan and apply:
terraform plan -out=tfplan terraform apply tfplan -
Use
terraform outputto obtain values such as the admin password or endpoint URLs.
Note: We recommend using remote state and not storing passwords in version control.
For detailed configuration options, including search sizing and common pitfalls, see the Terraform README.
DNS records
Create these records manually for CloudFormation deployments and Terraform
configurations that do not manage DNS themselves. The recommended
examples/main.tf
includes modules/cnames, which creates the three standard Route 53 records.
If you use that module, only the optional Connect record requires separate setup.
In order for your users to reach the Quilt catalog you must create three DNS
records (four if Connect is enabled) pointing to the LoadBalancerDNSName as
shown below and in the Outputs of your stack.
| Hostname | Target |
|---|---|
<QuiltWebHost> |
<LoadBalancerDNSName> |
<RegistryHost> |
<LoadBalancerDNSName> |
<S3ProxyHost> |
<LoadBalancerDNSName> |
<ConnectHost> (if Connect enabled) |
<ConnectLoadBalancerDNSName> |
If your hosted zone is in Route 53, we recommend Route 53 alias
records (record type A, alias target = LoadBalancerDNSName,
hosted zone ID = LoadBalancerCanonicalHostedZoneID). Route 53 doesn’t
charge for alias queries to AWS resources like ALBs, and aliases work at
the zone apex (which CNAMEs cannot).
If your DNS is hosted elsewhere, use CNAME records pointing to
LoadBalancerDNSName.
Quilt is now up and running. You can click on the QuiltWebHost value in Outputs and log in with your administrator password to invite users.
Routine Maintenance and Upgrades
Releases are sent to customers over email. We recommend that you apply new releases as soon as possible to benefit from the latest security updates and features.
CloudFormation updates
To update your Quilt stack, apply the latest CloudFormation template in the CloudFormation console as follows.
By default, previous parameter values carry over.
- Navigate to AWS Console > CloudFormation > Stacks
- Select your Quilt stack
- Click Update (upper right)
- Choose Replace current template
- Enter the Amazon S3 URL for your template
- Click Next (several times) and proceed to apply the update
Terraform updates
- Obtain the latest Terraform-compatible CloudFormation template from Quilt
and replace the file referenced by
local.build_file_path. Keep the path itself unchanged. - Update every
github.com/quiltdata/iacmodulerefinmain.tfto the latest release tag. -
Reinitialize Terraform, then review and apply the update:
 terraform init
 terraform plan -out=tfplan
 terraform apply tfplan
See the Terraform module’s routine update instructions for the complete workflow.
Upgrading from network 1.0 to network 2.0
Upgrading to the Quilt 2.0 network configuration provides improved security by means of isolated subnets and a preference for private routing.
An upgrade to the 2.0 network, unlike routine Quilt upgrades, requires you to create a new stack with a new load balancer. You must therefore also update your DNS records to point to the new load balancer.
Create a new stack with an existing configuration
Terraform users can create a new Quilt stack with the same configuration as an existing stack. This is typically useful when upgrading to the 2.0 network.
Configuration refers to the Quilt stack buckets, roles, policies, and other administrative settings, all of which are stored in RDS.
-
Use the Terraform-compatible template obtained in the Terraform section.
-
Take a manual snapshot of the current Quilt database instance. For an existing Quilt stack this resource has the logical ID “DB”. Note the snapshot identifier (“Snapshot name” in the AWS Console,
DBSnapshotIdentifierin the following AWS CLI command):aws rds describe-db-snapshotsBe sure to take a manual snapshot. Do not rely on automatic snapshots, which are deleted when the parent stack is deleted.
-
Apply the quilt Terraform module to your new template and provide the snapshot identifier to the
db_snapshot_identifier=argument.You must use a Quilt CloudFormation template that supports an existing database, existing search domain, and existing vpc in order for the terraform modules to function properly.
-
You now have a new Quilt stack with a configuration equivalent to your prior stack. Verify that the new stack is working as desired. Delete the old stack.