quilt
Benchling Webhook Integration for Quilt
The Benchling Webhook creates a seamless connection between Benchling’s Electronic Lab Notebook (ELN) and Quilt’s Scientific Data Management System (SDMS) for Amazon S3. It not only allows you to view Benchling metadata and attachments inside Quilt packages, but also enables users to browse Quilt package descriptions from inside Benchling notebooks.
The webhook works through a Benchling App that must be installed in your Organization by a Benchling Administrator and configured to call your stack’s unique webhook (see Installation, below).
Availability
It is available in the Quilt Platform (1.65 or later; Referenced Entities and
bucketless deployments require 1.71.0 or later) or as a standalone CDK stack via
the @quiltdata/benchling-webhook
npm package.
Functionality
Auto-Packaging
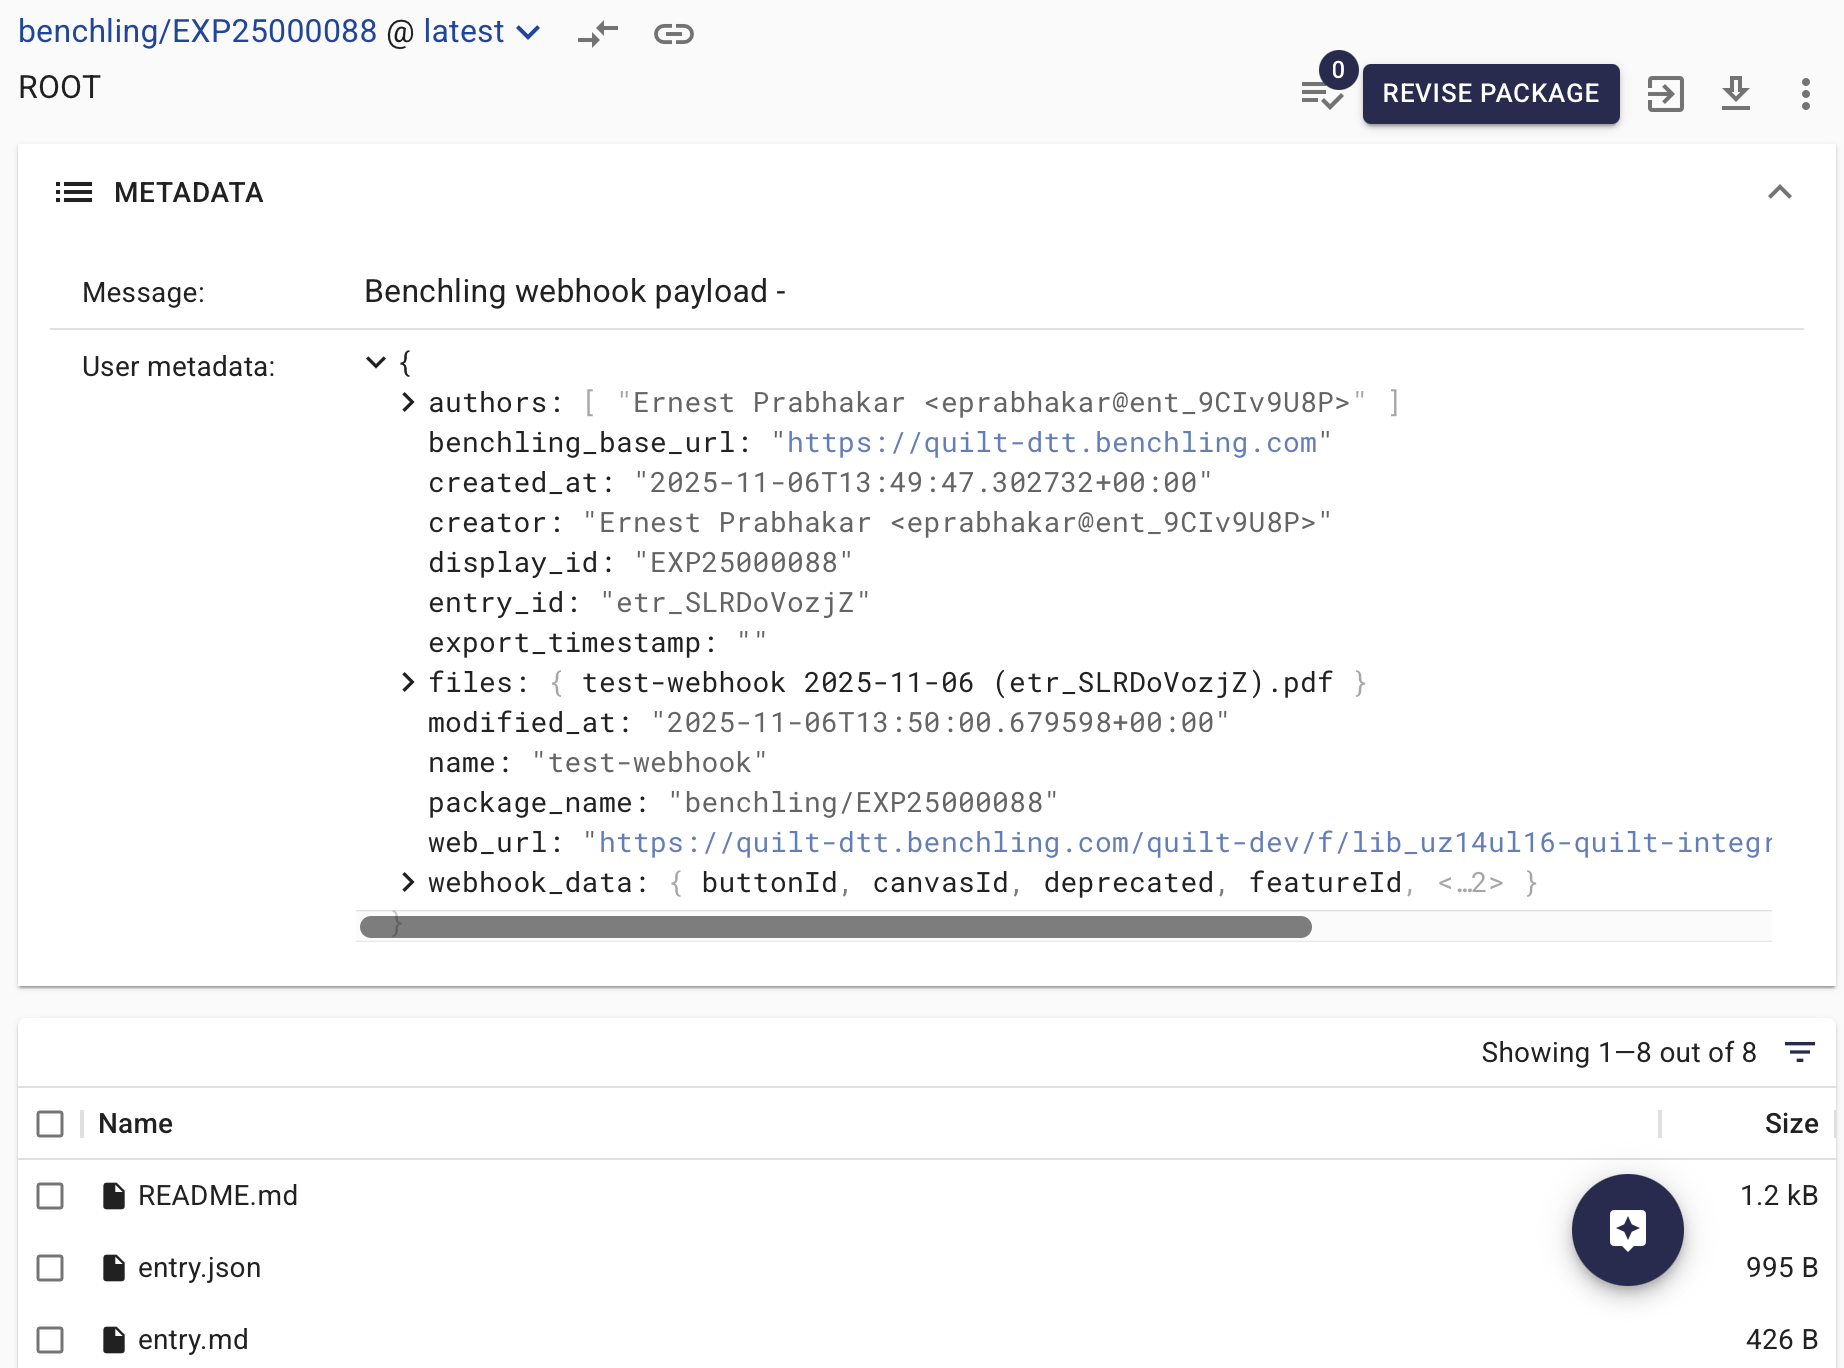
When scientists create notebook entries in Benchling, this webhook automatically:
- Creates a dedicated Quilt package for each notebook entry
- Synchronizes metadata from Benchling into that package, e.g.:
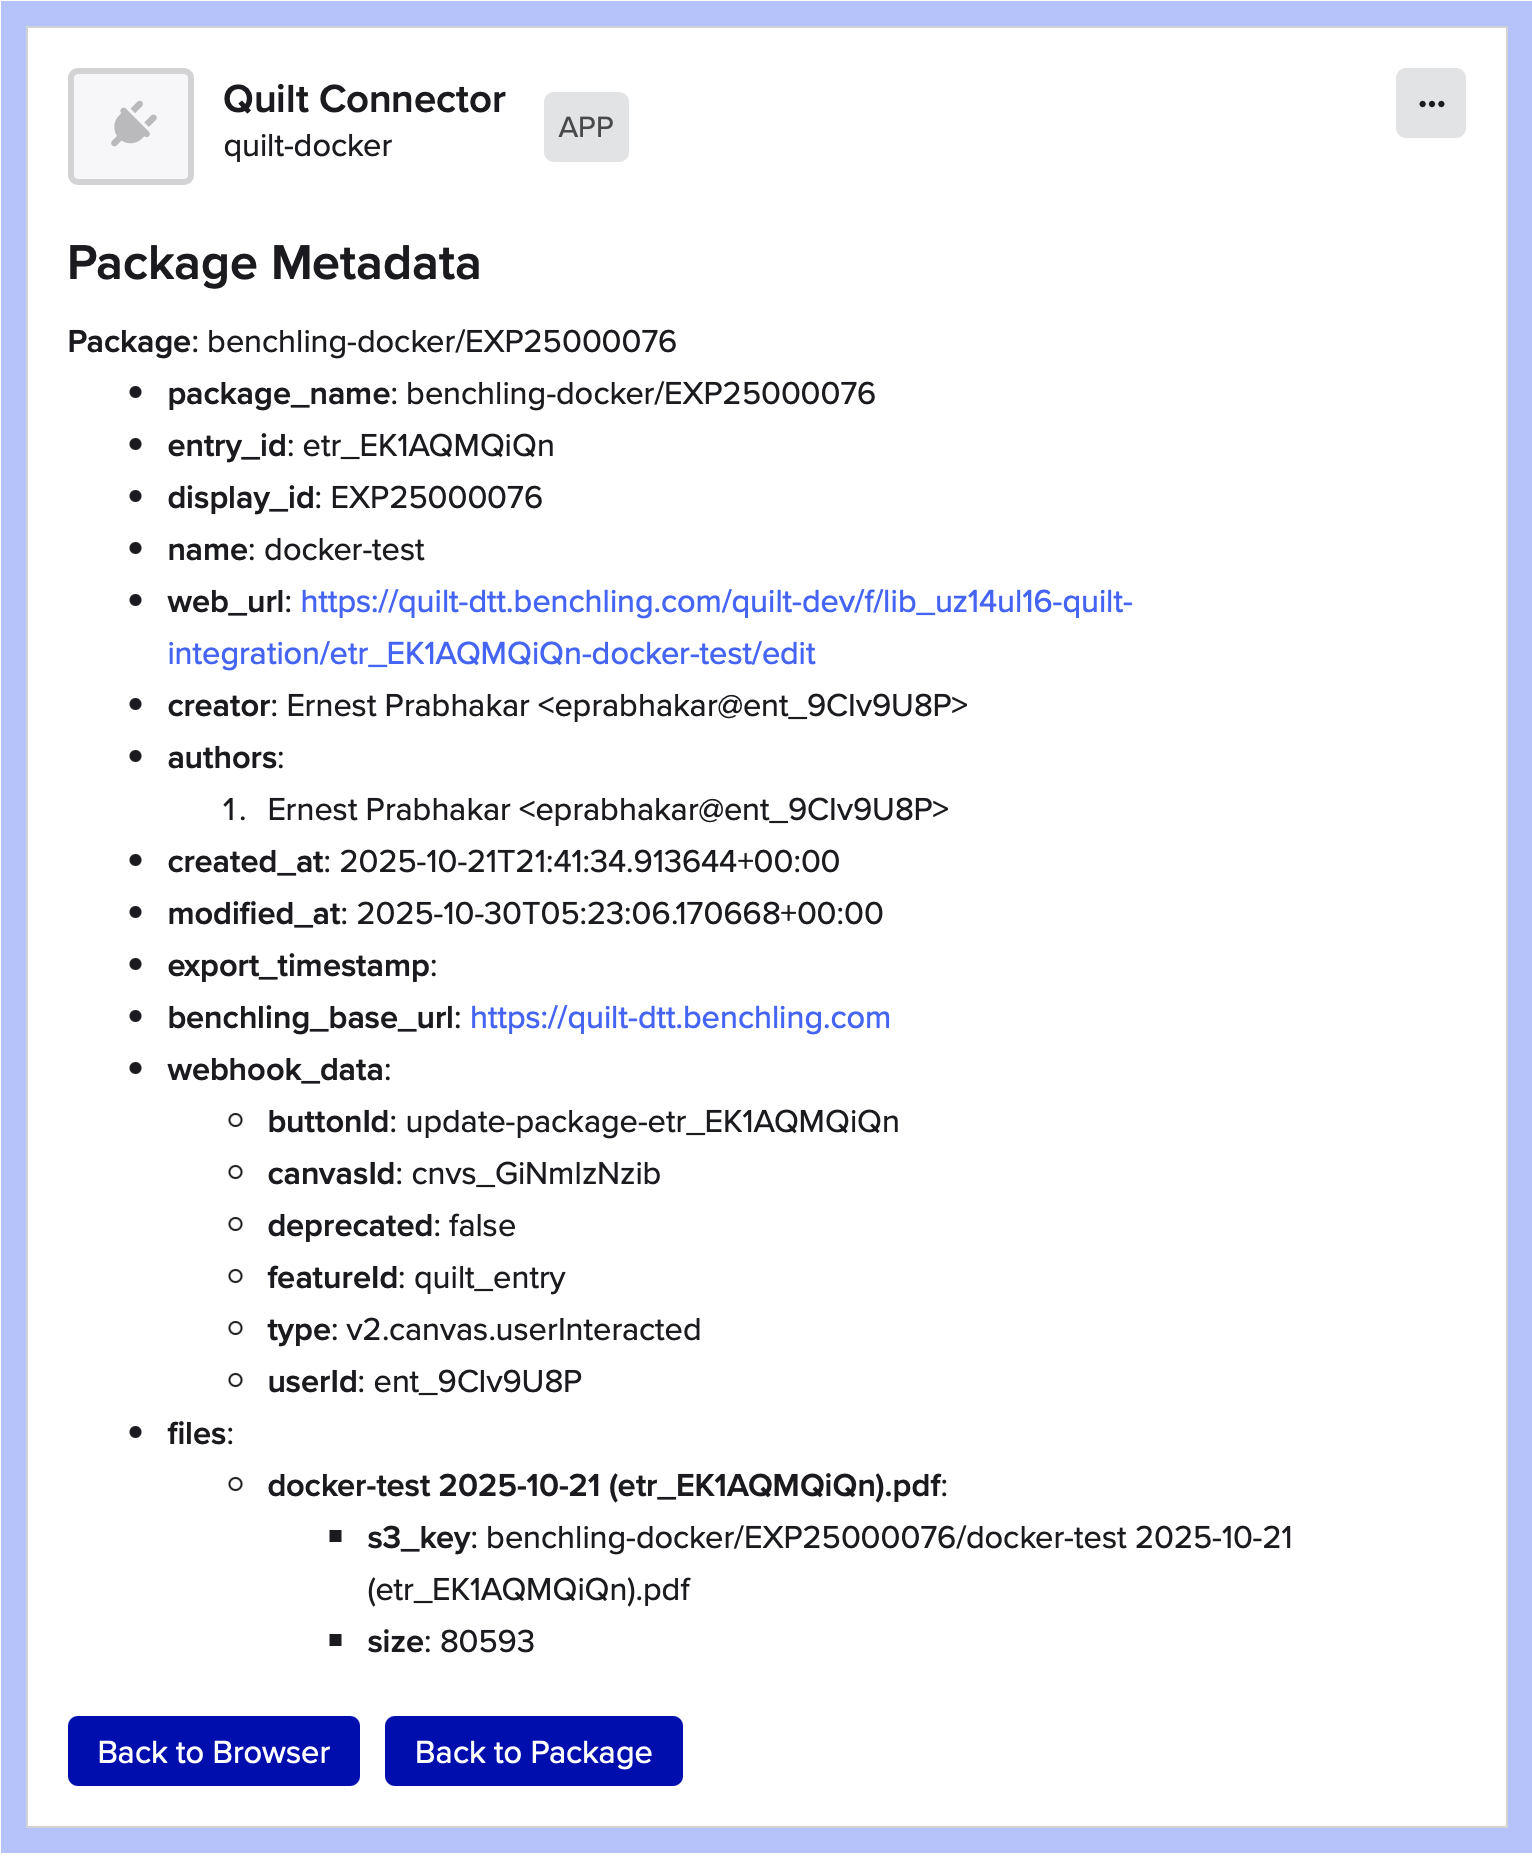
authors(list)created_at(ISO timestamp)creator(e.g."First Last <user_id@ent_XXXX>")display_id(e.g."EXP0000XXXXXX")entry_id(e.g."etr_XXXXXX")files(list)links(list of referenced Benchling objects — see Referenced Entities)modified_at(ISO timestamp)web_url(URL string)
- Copies attachments from that notebook into Amazon S3 as part of the package.
- Enables organizational data discovery by making contents available in Elasticsearch, and metadata available in Amazon Athena.
Bucketless Deployments
Auto-Packaging writes each entry’s package to a configured package bucket. That bucket is now optional — you can run the webhook without one. This suits organizations that link Benchling entries to Quilt packages spread across many buckets rather than a single dedicated one.
When no package bucket is configured:
- Setup omits the bucket. The configuration wizard and secret creation no longer require a package bucket, so you can stand up the integration without dedicating one.
- No default package is auto-created. Entry and canvas events skip per-entry package creation and instead surface the Quilt packages that already reference the entry.
- Discovery spans every bucket. Linked-package search runs across all Quilt package-view buckets in the stack (via Amazon Athena) instead of a single bucket, and the source bucket is preserved when you browse a linked package’s files or metadata from a Benchling canvas.
Note: Requires Quilt Platform 1.71.0 or later (or standalone benchling-webhook v0.19.0 or later).
Referenced Entities
When packaging a notebook entry, the webhook also discovers the Benchling objects that entry references — custom entities, sequences, results tables, and so on — and makes them searchable by their human-readable name. This answers questions like “show me every experiment that referenced QB-2743.1.”
The package metadata gains a links array, one object per referenced entity,
each with four fields:
[
  {
    "type": "custom_entity",
    "id": "bfi_xCUXNVyG",
    "name": "QB-2743.1",
    "slug": "qb-2743-1"
  }
]
typeandididentify the referenced object.nameis the authoritative Benchling display name, resolved via the Benchling API. It is the field you search on. It isnullwhen the app lacks registry access for that object or the object type is unsupported.slugis a lossy token parsed from the object’s URL, shown for reference only — it is never treated as a name or matched by name search.
To find packages that reference a given entity, search the Quilt Catalog for
its name (e.g. QB-2743.1); matches are scoped to links.name.
The raw discovery is also written to a links.json file in each package for
auditing and reprocessing.
Note: This requires Quilt Platform 1.71.0 or later (or standalone benchling-webhook v0.18.0 or later). It is distinct from the manual Package Linking below, which tags packages by
experiment_id.
Package Linking
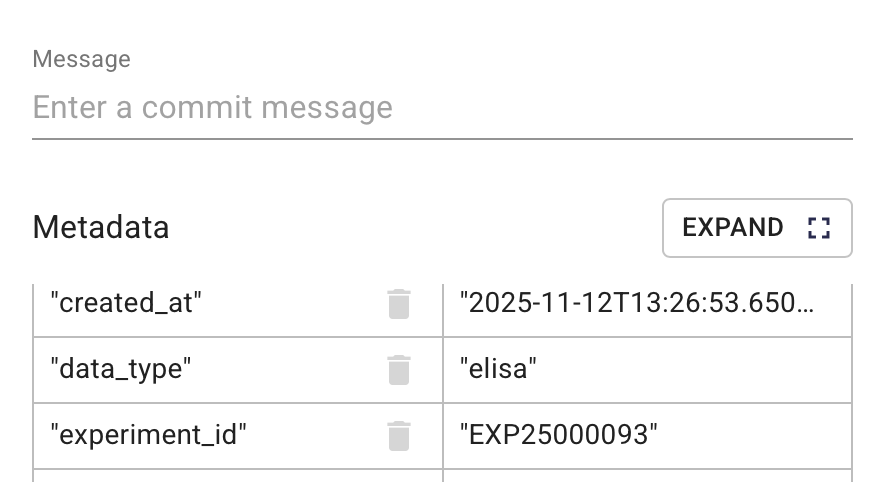
In addition, Quilt users can ‘tag’ additional packages by setting the
experiment_id (or a custom metadata key) to the display ID of a Benchling
notebook, e.g., EXP00001234.
From inside the Quilt Catalog:
- Navigate to the package of interest
- Click ‘Revise Package’
- Go the metadata editor in the bottom left
- In the bottom row, enter
experiment_idas key and the display ID as the value. - Set the commit message and click ‘Save’
Benchling App Canvas
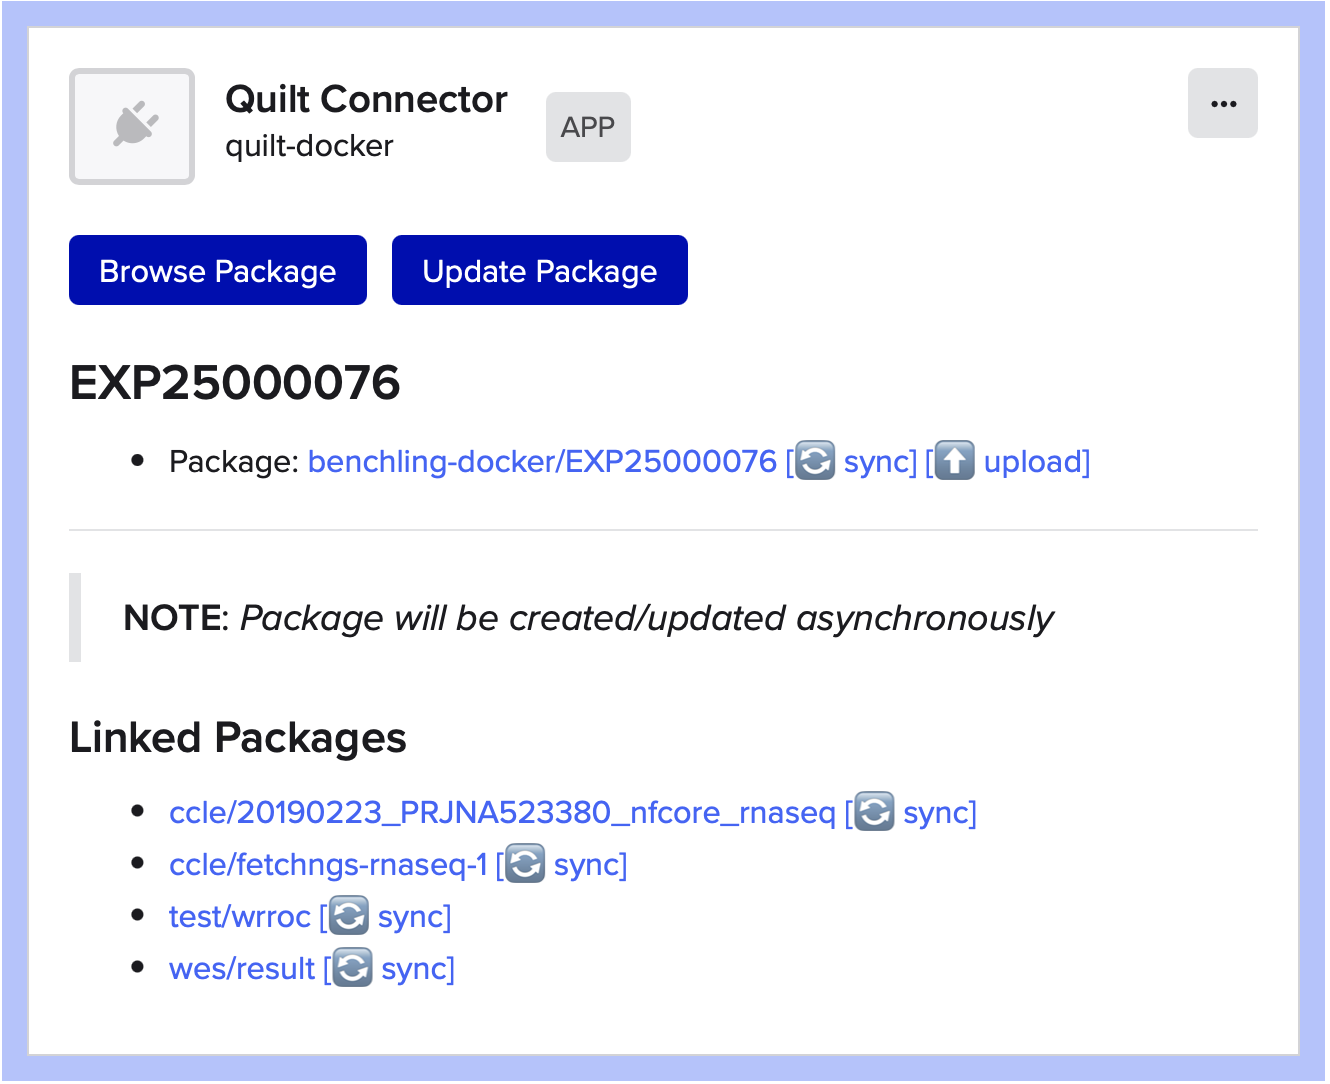
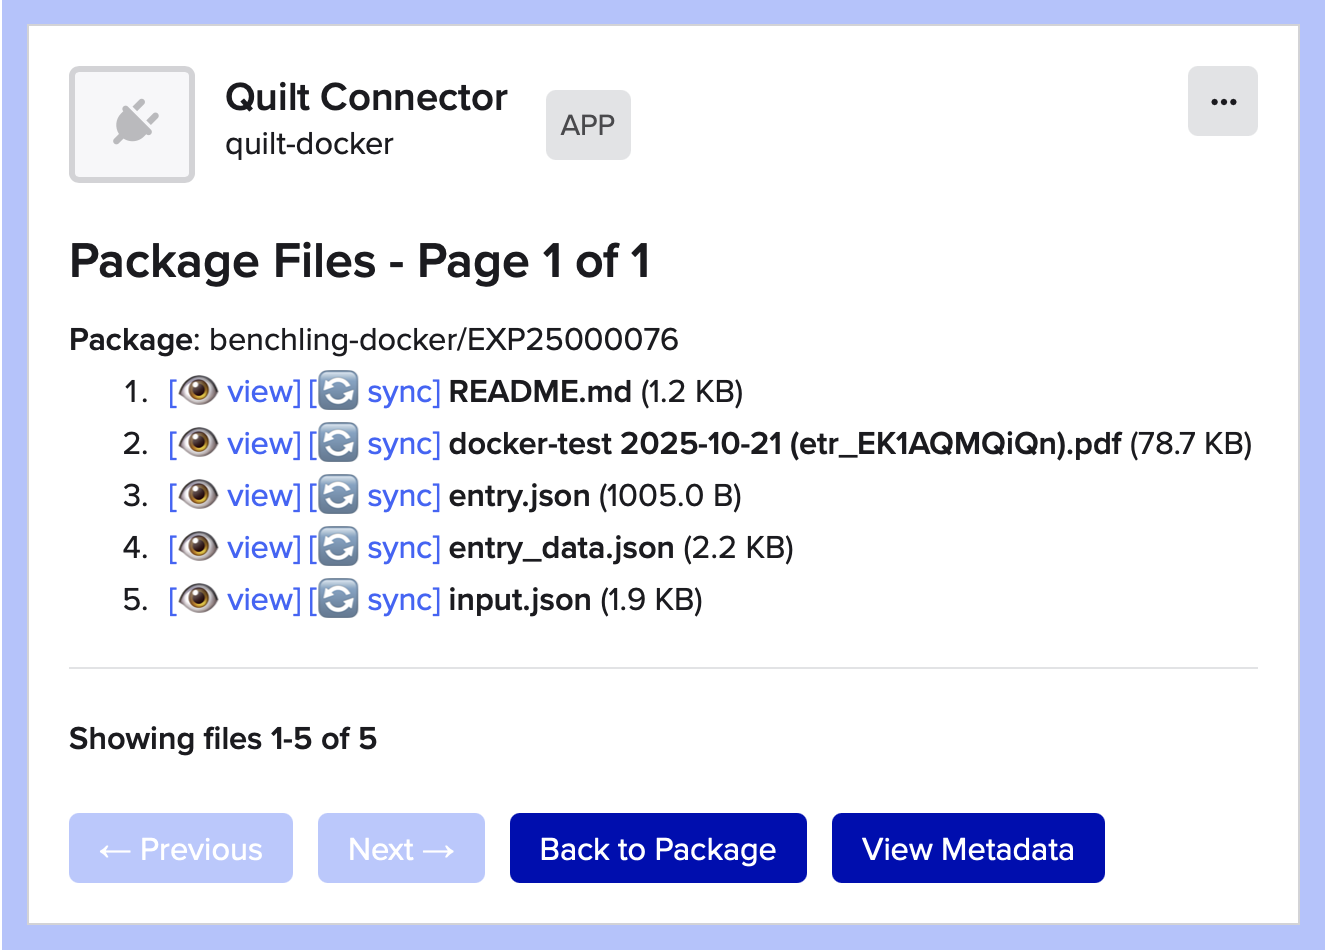
The webhook includes a Benchling App Canvas, which allows Benchling users to view, browse, and sync the associated Quilt packages.
- Clicking the package name opens it in the Quilt Catalog
- The
syncbutton will open the package or file in QuiltSync, if you have it installed. - The
Updatebutton manually refreshes the package. The canvas stays browsable while Quilt re-exports in the background, showing a “pending” badge that flips to “complete” when the new revision is ready. - Package updates also happen automatically: any metadata change to the
linked entry triggers a refresh, as does a Benchling
reviewRecordevent (e.g. when a notebook entry is submitted for review).
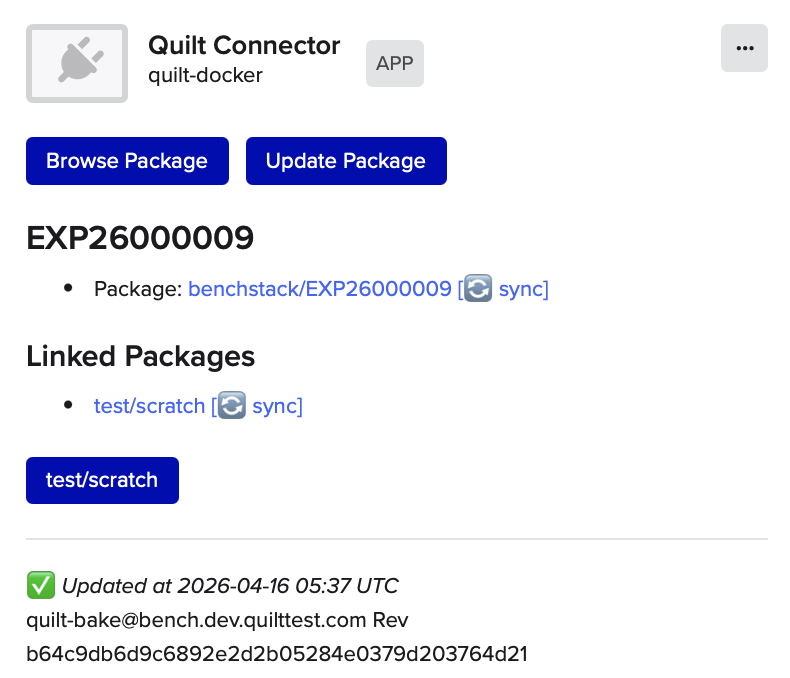
The canvas also allows you to browse package contents:
and view package metadata:
Inserting a Canvas
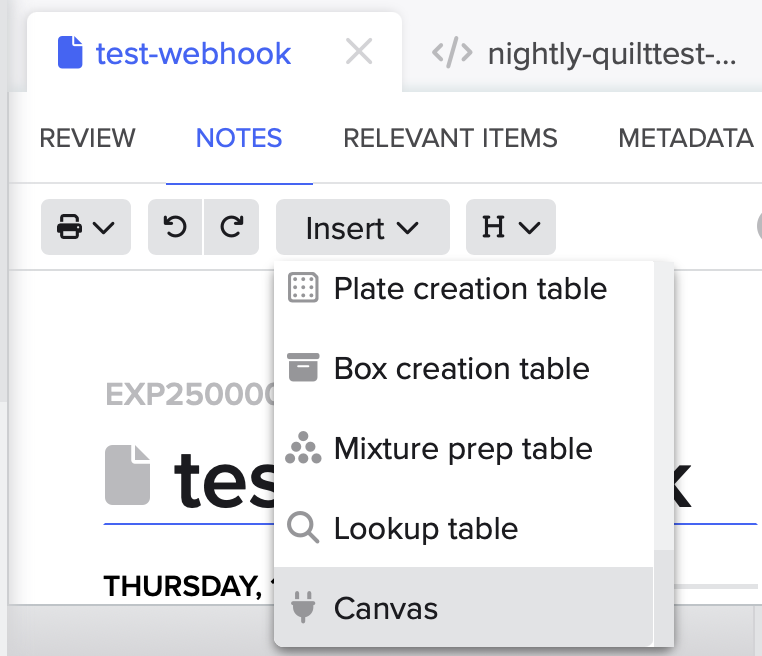
If the App Canvas is not already part of your standard notebook template, Benchling users can add it themselves:
- Create a notebook entry
- Select “Insert” → “Canvas”
- Choose “Quilt Package”
- After it is inserted, click the “Create” button
Installation
1. Installing the Benchling App
This requires a Benchling admin to use npx from
NodeJS version 18 or later.
1.1 Generate a manifest
npx @quiltdata/benchling-webhook@latest manifest
This will generate an app-manifest.yaml file in your local folder
1.2 Upload the manifest to Benchling
Follow Benchling’s create and install instructions. Save the App Definition ID, Client ID, and Client Secret for the next step.
2. Configuring the Benchling App
Your command-line environment must have AWS credentials for the account
containing your Quilt stack.
All you need to do is use npx to run the package:
npx @quiltdata/benchling-webhook@latest
The wizard will guide you through:
- Catalog discovery - Detect your Quilt catalog configuration
- Stack validation - Extract settings from your CloudFormation stack
- Credential collection - Enter Benchling app credentials
- Deployment mode selection:
- Integrated: Uses your Quilt stack’s built-in webhook, if any
- Standalone: Deploys a separate webhook stack for testing
Note: Configuration is stored in ~/.config/benchling-webhook/ using the
XDG Base Directory
standard, supporting multiple profiles.
3. Configure Webhook URL
Add the webhook URL (displayed after setup) to your Benchling app settings.
In the Benchling Webhook Setup dialog, set Webhook Routing Setting to
Suffixed. Benchling then appends a path suffix based on the kind of event
(/lifecycle, /event, or /canvas) to your configured webhook URL, which is
what the Quilt webhook expects.
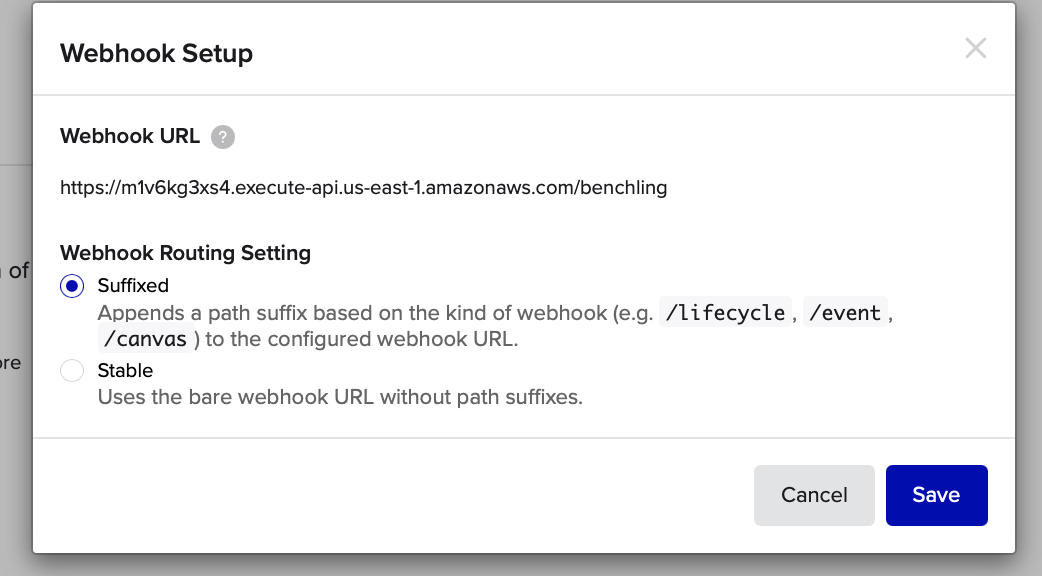
Important: Do not select Stable. It posts every event to the bare webhook URL with no suffix, which the Quilt webhook does not handle — requests return
404 Endpoint not found.
4. Test Integration
In Benchling:
- Create a notebook entry
- Insert Canvas → Select “Quilt Package”
- Click “Create”
A Quilt package will be automatically created and linked to your notebook entry. If you run into problems, contact Quilt Support